Civic Boombox (Part 1)
Introduction
My first car was a white, 2001 Honda Civic LX with side airbags
and a manual transmission. It was the car in which I learned to
accelerate, brake, steer, and shift gears. It was the car my dad
and I disassembled and put an aftermarket sound system into. It
was the first thing I owned that required care and maintenance.
This Civic was my introduction to the world of cars, and it never
failed me.
One misfortune-ridden summer night, I experienced another first in my Civic: my
first car accident. Fortunately, I survived the incident unscathed. The same
cannot be said for my car. I was completely devastated and the event left me shaken
for the next week or two. During my trials and tribulations, however, an idea presented
itself to me! My Civic may have been gone, but I still had its radio sitting somewhere
in my house. Why not turn it into something special?


Getting the Radio to Work
If you're like me, the first question that popped into your head
when reading that last sentence was probably something like "how
could a car radio work outside of a car?" Excellent question! Most
car radios (sometimes referred to as "head units") are self-contained
and do not need the context of a car to work. As long as the radio
has power, it will function like normal! That being said, you can't
just plug it into a wall and expect it to work. The first issue you
would run into is the fact that head unit does not have a power plug.
The second is that most wall outlets in America output about 120 volts,
which would thoroughly fry the head unit. So, if it cannot be plugged
into the wall, how can it be powered?
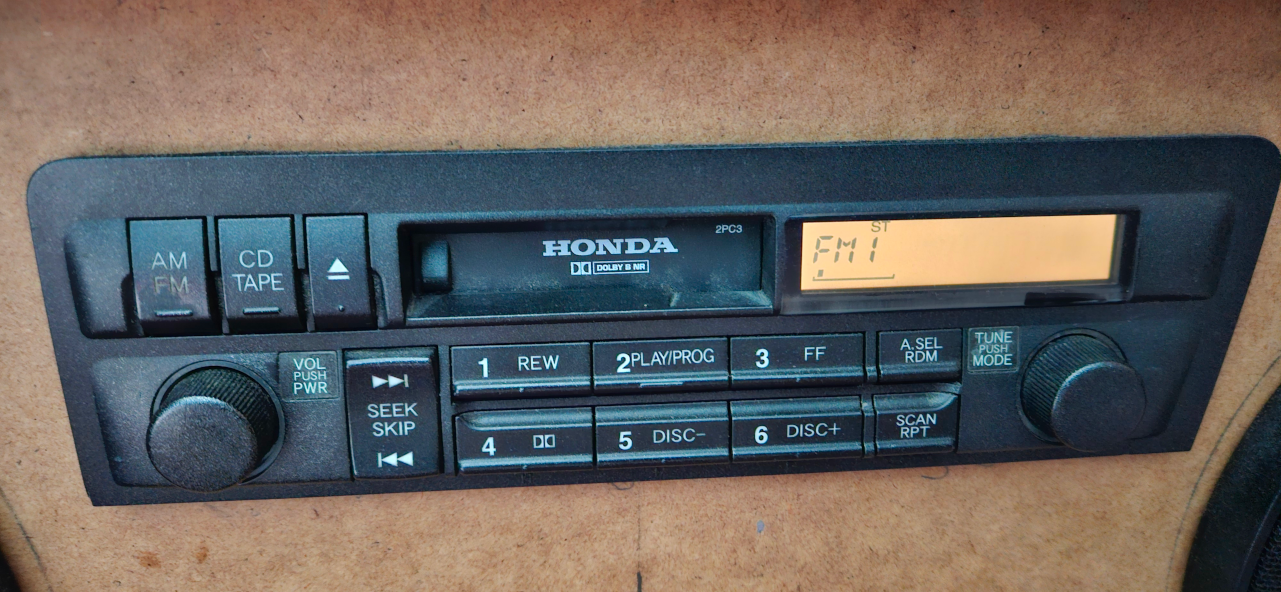
The head unit from my Civic (as well as most components in most cars) expects
to receive 12 volts DC. As long as it gets close to that much voltage, it
will work fine. As we have already seen, most wall outlets output 120 volts
AC, and this is completely incompatible with the head unit. In this context,
DC refers to "direct current," and AC means "alternating current." The specifics
of and differences between these two don't matter for this article. All we need
to know is that a device that expects DC receives DC, and a device that expects
AC receives AC. So, somehow we need to convert 120 volts (V) AC to 12V DC.
Fortunately, there are devices designed specifically to do that, and they're
relatively easy to find.
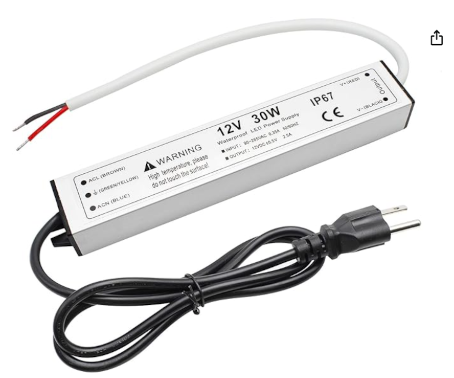
The Converter
I don't know what the technical name for this device is, but I referred to it as
a "12 volt converter" in my head, and searching that on the internet results in
devices similar to the one I used, so we're going to call it that. The 12V converter
expects 120 volts AC (a standard wall socket) and outputs 12V DC (which is exactly
what the head unit expects). This is all well and good, but there is one other relevant
specification that I have dutifully ignored thus far: current. Electrical current is
measured in amperes (amps, A, I, etc.) and it behaves a little differently than
voltage. We know that the device supplying power controls the number of volts. If the
device is a wall socket, then it can be trusted to always deliver 120 volts, regardless
of what is being powered. Current works differently. The device being powered is what
controls the current, and this can cause issues, because not every power supply can supply
any amount of current. Let's consider an example.
Let's say you want to charge your phone. For the sake of this article, your phone charges at
5V DC and it draws 3 amps (A). Since this isn't 120V AC, you need to convert the power from
the wall to be 5V DC, and this is done with a power brick. The power brick receives 120V AC
and outputs 5V DC, which is totally fine and exactly what is needed. However, we need to
take current into account before we can officially stop thinking about this. The phone will
always try to draw 3A when charging, and for this reason, the power brick needs to be able
to supply 3A. If the power brick is rated for at least 3A, then your phone will charge and
nothing bad will happen. If, however, the power brick is rated for less than 3A (more is
fine), problems can occur. The least problematic occurrence is the power brick failing, and
the most problematic is fire. So, it is very important that the power supply can support the
amount of current being drawn from it.
Embarrassingly, I don't actually know how many amps the power supply (12V converter) I bought
can support, and I don't actually know how many amps the head unit draws, so I was really flying
blind when I put this together. That being said, I had good reason to expect it would be fine
and I've left the radio running in my room almost 24/7 since I built it a few years ago, and so
far no issues. With that, let's look at some of the other components needed to complete this
project.
Additional Components
So far, the only components decided upon are my Civic's head unit and a 12V converter.
Early on, I decided that this radio also needs to support bluetooth and have an audio
amplifier. The bluetooth is for when I get tired of the radio, and the amplifier improves
the sound quality and volume. Neither of these are built into the head unit (technically
it has an amplifier, but not a powerful one), so they need to be handled somewhere else.
Little bluetooth amplifiers are easy to find on Amazon, and a lot of them support running
at 12V, which fits perfectly into our system. They also support switching between bluetooth
and line in (our head unit's audio) automatically, which makes them really great candidates
to be the heart of the system. For all of these reasons, I selected one of those to run the
audio through.
In case it wasn't obvious, actual speakers are also needed for this project. The head unit
doesn't do much good if there is no way to listen to it. For these, I selected the aftermarket
speakers that were in my Civic when I wrecked it. When combined with the bluetooth amplifier,
these speakers sound pretty good. The final component of the system is the box itself, which is
just made of 3/4" MDF.
Putting it All Together
Before we get into the actual assembly, I want to go over each component of the system one more
time.
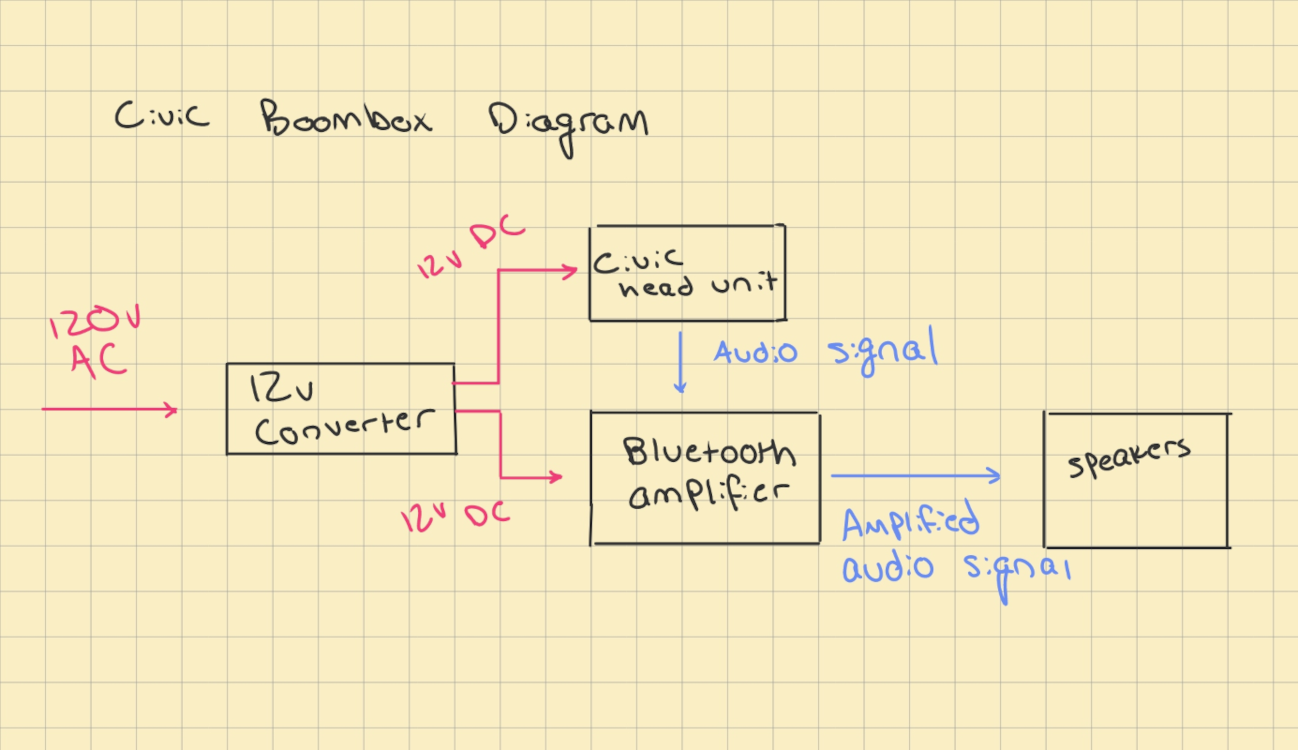
The 12V converter plugs directly into the wall and provides power to the whole system. It is
directly connected to the head unit and bluetooth amplifier. The bluetooth amplifier receives an
audio input from the head unit (which provides AM/FM radio, cassette, aux, etc.), amplifies it,
and feeds it directly to each of the speakers. To put the radio in bluetooth mode, the amplifier
just needs to switch from the radio's input to the built-in bluetooth input, and it automatically
does this any time there is a bluetooth connection. Finally, all of these components mount inside
the box to give a single, portable unit.
With each component of the system explained, we can now get into the assembly, which you can find
in part 2 of this article.
This article was uploaded on January 3, 2025 Last edit was January 10, 2025